So, remember this sexy little fleshy puke colored piece?
Which I found at Savers here in Madison for only $25.00? Well, It was high time to do something with it. It's been sitting in the garage since I brought it home and made Matt unload it from the car. I bought it to go in the entry way, where the desk from Matt's Grandma Dottie
used to be. When I moved the desk into the living room a couple week ago, all the stuff we had been "storing" (aka unloading and not putting away) on top of and below said desk went into piles on the floor in the entry way. And they have stayed there over the past couple weeks, even though we have had company and I trip over something almost every morning. Matt finally complained about the piles last week (yeah, it took that long) so I stopped into our favorite home store and picked out a color for our new entry way table. I was originally going to paint it white, but quickly realized that Matt's Pig Pen fingerprints would have it turned brown in a week. I picked the next best thing: Chopstick from Martha Stewart, which is yellowy color. I had visions of a bright "holy sh*t that's yellow!" color, but since I'm trying to create
flooow throughout the house, I thought something less jarring would be better....at least to start with. (And I'm trying to force something yellow into each room of the house, which I'm hoping will also help with the flooow{and though you may be annoyed with my flooow spelling, I like it, so back off} ).
I started off by wiping down the whole thing with damp paper towels and then removing the drawers, doors, and hardware. I decided to try and save the hardware by cleaning it up and painting it all some non-fleshy colored color. And it worked and looks great! Before:
After:
Not too shabby, huh.
Then I lightly sanded the whole table with sandpaper. All we had was drywall sandpaper, which is probably more rough that normal sandpaper, but it seemed to do the job. I know I should have probably stripped the entire dresser of the flesh colored paint, but I figured it would work as a sort of primer for the yellow paint.
{Side note....I never ever prime anything. Which is probably breaking some big rule of designing and painting, but I figure if I'm going to have to do at least two coats of paint, I would rather it all be the same color. And honestly, I have never ended up regretting this decision. But to each their own, I promise not to judge if you choose to waste tons of your own valuable time and muscle aches on something as pointless as priming :) }
After sanding everything, I wiped it all down again with a damp paper towel. Then I popped open the paint can and was a little surprised at how pale the paint looked (I was also in the dimly lit garage at about 7:00pm too) but forged ahead with the first coat. I was just finishing it up as Matt got home and gave me the post title
criticism comment. And I sort of liked the way it looked, but knew I would end up hating the rusticness (I don't want any fleshy remembrance). Here's after one coat:
Here's showing the difference between 1 coat (right) and 2 coats (left):
Last Thursday morning before work (I always get really invested in something right before going to work. I had 30 minutes, so I figured I should use them. Even though I hadn't even started getting ready) I did a second coat and loved how it was still looking antique-y/cottage esq but not as much as the night before. I ended up doing one more coat after work Thursday night and also sanded and spray painted the hardware. I was a little concerned that when I took the hardware off, only the round knobs on the doors came off. The vertical metal pieces behind the knobs were attached by glue or something (here's the pic again, so you don't have to keep scrolling back up...this is the same picture as above, not an updated one)
I didn't want to pry them off and end up ruining them or ruining the door, so I did the next best thing. I just painted over them in the new color...we'll see how it looks once it's all put back together.
Here is the finished product, without the doors and drawers put back on....
Now...I'm going to guess correctly that you're thinking "Umm, did you even paint it? It looks the same." I thought the same thing when I looked at this picture, but take a look when I compared the new color to the old (before I had painted the front of the doors):
Satisfied? You may also be thinking that the new color looks a little "rough" on that center non-removable piece, and you again wouldn't be wrong. I decided to leave the whole thing a little "rough" looking to give it more depth and character than a perfectly painted piece of furniture. And with a sometimes filthy dirty husband, 2 puppies, and a cat who thinks she can walk on anything, I figured a rougher looking piece of furniture would bode well in our house. I want to be able to use it and allow people to touch it if need be and not freak out over someone looking at it wrong or leaning against it to put in their shoes.
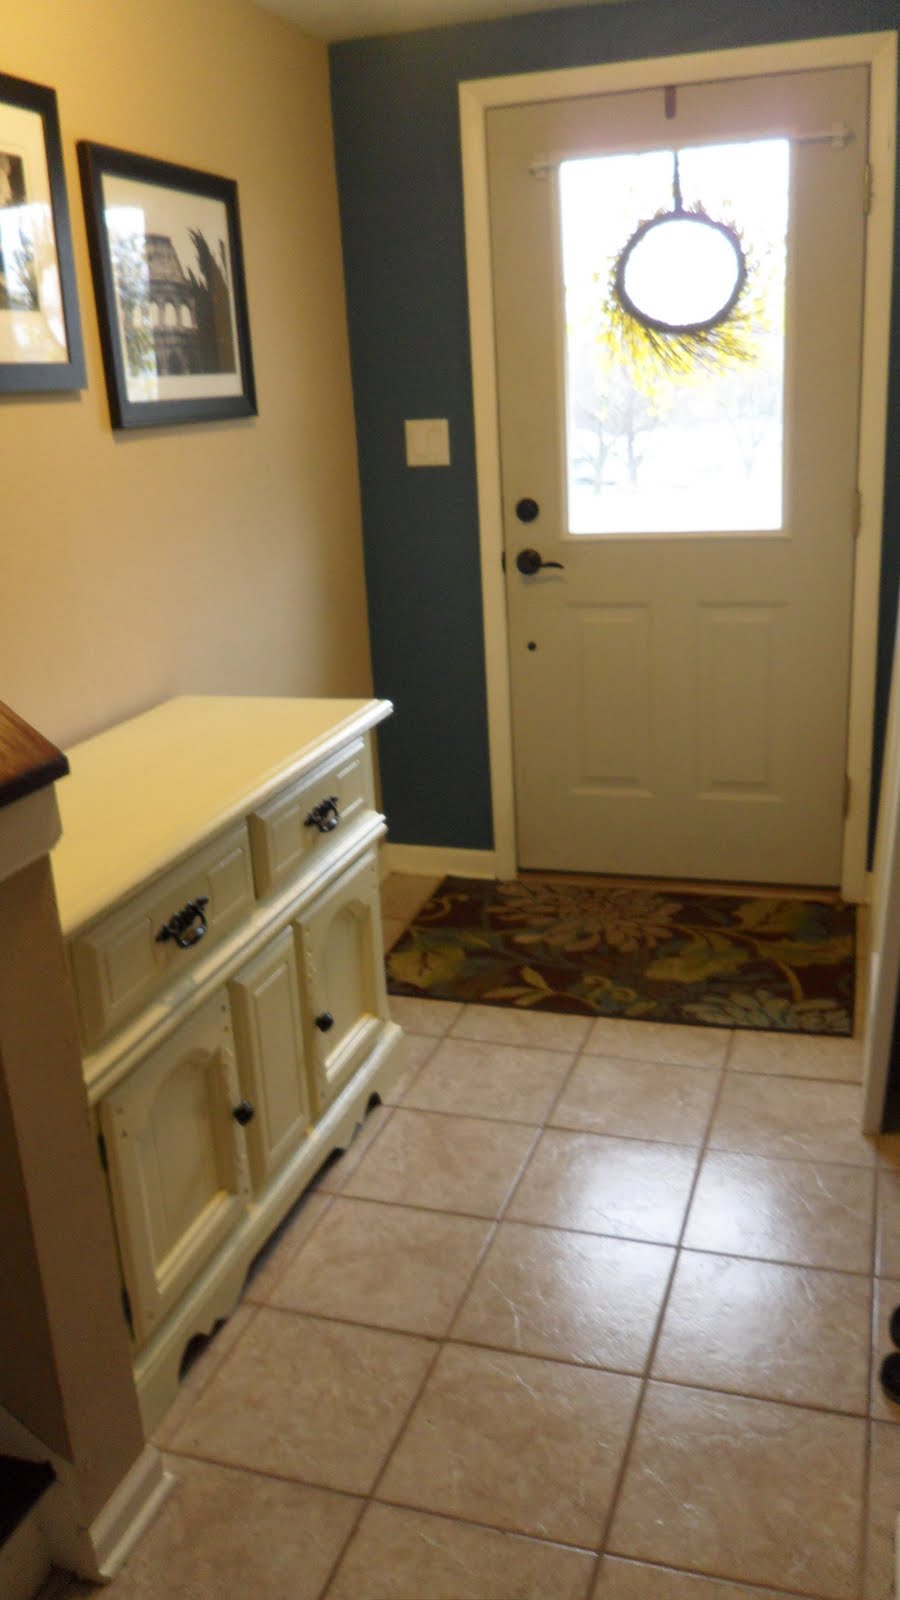
And here's my little beauty all put together and in place in the entry way!
{The creepy circle on the door is an outside spring wreath}
Here's the table top decor. I found the frame at Savers this last weekend for $3.99! It's actually super heavy duty and I thought I would paint it white or dark brown, but ended up keeping it silver. The white thing is an artichoke or something and I found it at Burlington Coat Factory (of all places) (also last weekend) for $9.99.
And see what I mean about Fiona? She just can't keep her cute nose out of my business. She can also see out the front door now too.
I feel like the table kind of blends into the tan walls a bit too much, so I'll paint the entry way sooner rather than later (hopefully). What do you guys think??
~S~