Showing posts with label Home Made. Show all posts

Sunday, December 4, 2011

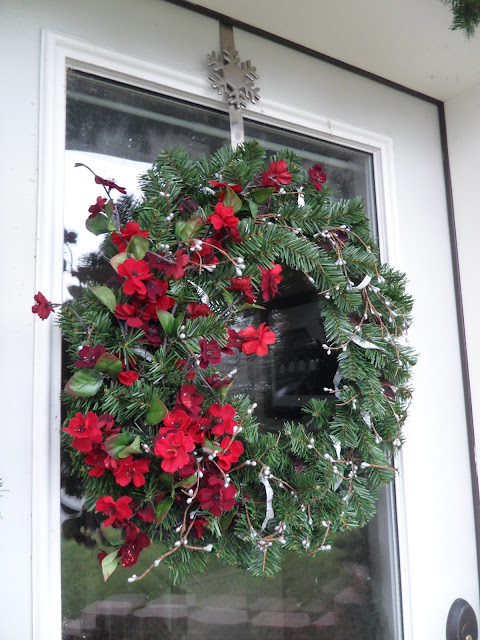
A fabulous-o Christmas wreath!

 Now, I am not a crafty person.  I don't really like crafty things or scrap booking, but I thought I could handle making a wreath. So, while at Michael's one night, I found some amazing items on sale, one of which was a plain wreath for $4.49.  I walked around the store looking for things I could use to decorate it and randomly picked up a few things.  I didn't really have a plan besides the colors I wanted to use....Otherwise I just winged it.  Here are the items I picked out to use:


Items used:
  • One plain wreath ($4.49!)
  • Skinny silver ribbon (2 rolls for about $2.00 each)
  • Wide, but see through Burgundy ribbon ($2.00)
  • Bendy twig/silver sprig rope ($2.49)
  • Burgundy flowers I thought looks Christmasy (I think they were about $3.00 each...and I got 3)
Step 1: Wined think burgundy ribbon around the wreath, while tucking it underneath some of the branches.  I wanted it to be seen, but as a background dancer, not the star.


Step 2: Circlw the twiggy rope around the top of the wreath, while tucking into place.  ( I  just tucked both ends of the twiggy thing into the innards of the wreath, while making sure it was secure by tucking the wreath branches around the twiggy part....so basically lay the twiggy thing on top and secure it in a way that it won't blow away.  Got it?  Good.)


And a close up:


Step 3: Wind skinny silver ribbon around wreath, spacing it between each strip of burgundy ribbon.


Step 4: Tuck Christmasy flowers into the wreath in an artsy-ish kind of way...or at least try to.


Step 5: Be super giddy and way too excited about a homemade wreath that took about 5 mins to make...and force your husband to admire it once it's hung on the front door...while it's raining outside.


What do you think?  Not too shabby for a first crafty try?  I honestly look for it every time I drive up to the house and keep waiting for crowds of people to knock on our door to ask where such a fabulous wreath came from....no seriously.

~S~

Thursday, December 1, 2011

A little privacy, perhaps?

So, those of you who have been to our hone may remember our naked windows throughout the house.  And naked windows = neighbors seeing naked people in our bathrooms.  Whoops.  Probably should have made window treatments in the bathrooms a priority over mums in flower pots.

So, a couple weekends ago, I decided to get off my butt and make some curtains.  Yep, I said make.  I had wanted to put up some dark brown bamboo style roman shades in both bathrooms, but all of our windows are very wide, and I couldn't find anywhere thay sells our window sizes off the shelf.  (By the way...I had an estimate done for custom shades.....$385 per window!  PLUS installation!  Pass.)  I had four white linen curtain panels just sitting in our linen closet, not being used (they used to be on the living room windows, but then I accidentally washed them in hot water, then dried them...and they came out about a foot shorter and looked weird) 

Sooo, I measured both bathroom windows and realized that I could use one panel for both of them.  I cut them to size, leaving 2 extra inches on all sides, since I was going to hem them.


I folded over about an inch, then pinned and ironed the edge, so it would be crisp, then folded it over again, so the rough edge was completely hidden on the backside.


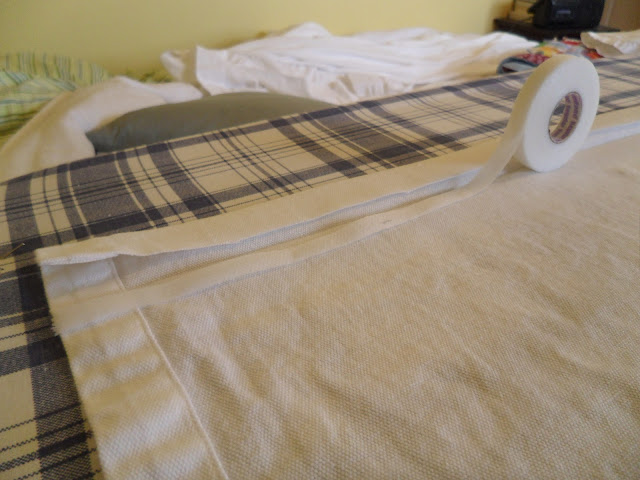
Now, once I had the crisp edge, I pulled out some iron-on hemming tape , pressed it underneath the hem (making a hemming tape sandwich with the fabric)....


Then ran the iron over both sides of it, creating a nice and clean no-sew hem.


And at this point I just realized that I haven't show you an update on the bathroom progress...for oh about 6 or more months...which is sad because the bathroom was the whole reason Matt and I started this blog to begin with.  Well, here is the current paint color, which is Sherwin Williams' Foggy Day color matched to Glidden's Premium Interior (Young House Love had bragged about Glidden's in the past so I thought I would give it a whirl since I'm not too attached to any paint brand.  Verdict?  I would say a 7/10...good, but not amazing.)  Here is the naked picture.  Children advert your eyes.


Here's a wider shot, so you can enjoy the color against the floors.


Do you love it?!  How about now?


I said, do you love it?!  I really don't care if you do because I would marry this bathroom if Matt ever comes to his senses and leaves my crazy, nutty butt.

Here's the downstairs bathroom window....I forgot to get a picture of it before hanging the curtain.  Now, this window is in the corner of the room, so I wasn't able to have two curtain panels, so I hung the rod about 6 inches farther over on the left side, to create a one sided curtain pull-a-ma-bob, instead of two.


We're painting this bathroom in a month or two, so the baby poop green will be gone soon.   I used a curtain rod I already had in the fancy bathroom and picked up three $5.00 curtain clip packs from Target to spread out over the two windows.  Oh and I picked up another curtain rod for the green bathroom for about $5.00.  Total investment for two bathroom windows to have curtains....about $20.00.  Not too shabby when that $20 is compared to the almost $800 a certain big chain department store would have charged us.

I realize it's maybe a little odd to have curtains like th eones above in bathrooms, but all of the curtains in our house are white, hung on the same rods, with the same clips...which I think gives us nice cohesive look throughout the house.

What do you think?  Are you happy your bare butts won't be displayed all over our neighborhood anymore?  I know I am...who knows about the neighbors though.

~S~

Thursday, April 28, 2011

A little vanity perhaps?

The bathroom make over continues...and continues...and continues.  Matt is back to his 12-20 hour days at work and I have been a couch slug lately (seriously, will it even stop raining and get above 43 degrees?), but decided enough was enough and I needed to get a move on with things.  We also have a whole mess of company coming next weekend too, so the clock was ticking.

The next step was to either replace or redo the bathroom vanity.  We had looked at a bunch of different stores, websites, and even thought about building our own, but when it came down to it, we were flat out running out of steam on this remodel.  Sooo, I used one of favorite hobbies to our advantage....painting.  I decided that the most economical solution would be to paint the vanity.  (Also, our vanity is a really weird size, 41" wide....where most pre made vanities are 39" or 43", so we would need to have it custom made, which = $$$$$ and I like to save all our money for shopping sprees at Target.)  Here are two super old pictures to remind you what the vanity looked like at the beginning of the bathroom project:


And at this time, I would like to make an apology to the Martha Stewart Paint line...in this post I complained about not liking Martha Stewart's paint...but I have determined that I just don't like it for painting walls.  I am in love with her paint for painting furniture.  The thickness of the paint covers furniture like it's no one's business!  One coat into the vanity painting project and I was ready to make out with a paint can.  But I'm getting ahead of myself.

We picked out a rich and deep chocolate brown color from Martha's line and had a quart of it made using semi-gloss paint.  We brought it home, and like most projects, the paint sat there for about a week before I got off my butt and started redoing the vanity.  I first took off both doors and the hinges (the doors did not have knobs on the outside) and wiped the doors and vanity frame with a damp paper towel.  The finish on the whole thing was kind of coarse to begin with, (and I'm lazy) so I skipped sanding it all down and jumped right into the first coat of the brown paint.  And loved it!  Even one coat in, I was freaking out over how good it looked!


{And yes, it you noticed there is a pregnancy test box under there...
NO we are not pregnant and not trying and will not be for a very long time...
I just freak out once in a while and convince myself I could be, when I'm not.}


Granted, it looks a little rough since it's only the first coat, but are you loving it?!  I think it really pops in the room now too, instead of getting lost with the white trim and white vanity top.  The night I did the first coat, I dragged Matt upstairs the second he walked the door to show it off and he was almost as excited as me about it.  I've done two more coats since and it looks aaaaamazing!  I think I'll do a coat of polyurethane over it all since it will most likely come into contact with water quite frequently.  I just need to pick up the new knobs for the doors and pull thingys for the fake drawers above the doors.  (By the way...fake drawers in a bathroom are the most ridiculously annoying thing ever...where do I put the toothpaste?!  So far, on the counter top.)

So, once we decided to paint the vanity, Matt and I also decided to make a frame for the bathroom mirror to match.  Here's a quick glimpse of the almost completed frame that Matt and I (mostly Matt) built from scratch!


PS....We got our first blog comment ever this week!  Thanks LC for commenting! :)  Also, thank you so much to everyone out there who reads my posts and follows us.  I honestly appreciate every comment, email, and text I get from you all and your support for this blog :)

~S~